AWS SQS message broker for Python Celery

How to use AWS SQS as message broker with Python Celery background task manager? How to grant permission to an EC2 instance to access another AWS service through IAM Role?
This topic is a continuation of my previous post about Running background task in Python Celery.
For this topic, we are going to use AWS SQS as our message broker for Python Celery. Deploying all of these in an EC2 Instance. Hence, we are going to need to assign permission to the EC2 Instance for accessing an SQS service.
AWS SQS
If you have been building Microservices application, then you probably know about the Amazon Simple Queuing Service (SQS). Along with other AWS services like SNS and Lambda functions, you can build an event driven system to decouple your applications.
Let’s start by deploying a new AWS SQS service. Sign-in to your AWS console and search for “SQS”. Keep in mind that AWS SQS is part of the Free Tier, meaning there is no charge as long as you don’t exceed the threshold of 1 million requests each month into your account. Read more about pricing.

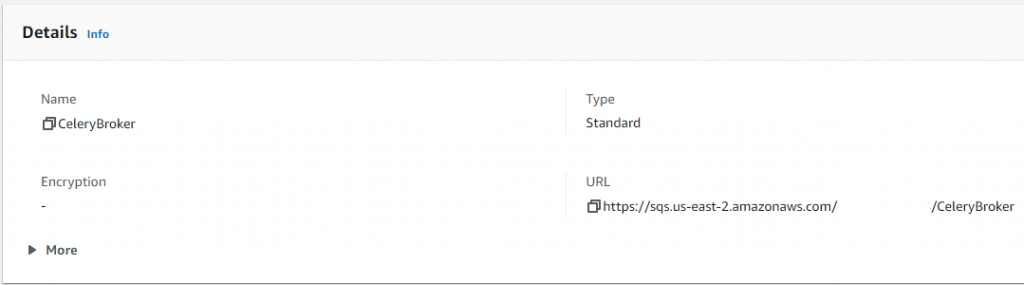
Once you are on the SQS service page, create queue, go over the configuration options. Select Standard as the type of queue, and I’ll give my SQS a name “CeleryBroker”. Take note of the name, later when we configure our Celery, we will need this to define as the default queue. And for the access policy, choose method Basic. The rest, we can just leave the default setup.
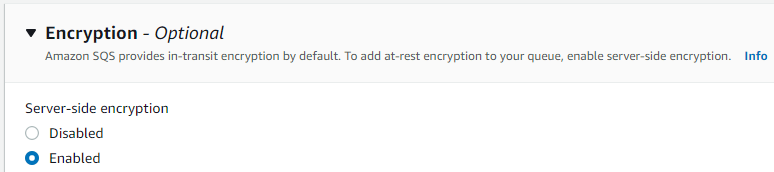
For additional security, especially if you are deploying this in a Production environment, I recommend to enable the “Encyption”. This will add an “at-rest” encryption to your queue on top of the default “in-transit” encryption.
Later, when we configure our Celery, there are two information that we will be needing here. The name (for this example “CeleryBroker”), and the URL of our SQS service.
AWS EC2 Instance
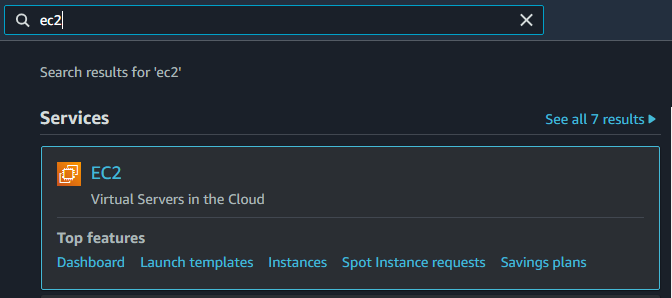
The next step is to deploy our EC2 Instance. Unlike AWS SQS that is always free, AWS EC2 has a 12 month free trial with 750 compute hours per month, following the initial sign-up date for a new account. To follow along this tutorial and for testing, you can choose a t2.micro instance type that is a Free tier eligible. Search for “ec2” in your AWS console. Read more about pricing.
Before deploying a new EC2 instance, it is important to mention that you have to choose the same Region for all your AWS services that you want to communicate with each other. So, if I created my AWS SQS in US East (Ohio) us-east-2, I will also have to deploy my EC2 instance on the same Region.
Deploying an EC2 instance. In the EC2 service page, launch instance. Select “Amazon Linux 2 AMI” 64-bit as your Amazon Machine Image (AMI). This Image already has AWS CLI and Python3.7 installed. Then select “t2.micro” as instance type. For the next steps of the launch wizard, you can leave the default setup for now. And on the “Configure Security Group” step, I recommend to add a firewall rule for SSH on port 22 and limit the traffic that can reach your instance by selecting “My IP”. Security group is a component of a VPC that control traffic at EC2 level.
Make sure to download your SSH Key pair after launching your EC2 Instance. This is the only time you can save a copy of your private key file after launch. You will need the key file if you plan to access your machine on your local computer.
Granting permission to an EC2 Instance to access another AWS Service
There are two ways we could grant permission for our EC2 Instance to have access to the AWS SQS service.
Granting permission through an IAM User
One is to create an IAM User for our application and configure the credentials directly through AWS CLI. For this approach, you need to provide a user name for your IAM User. Select AWS access type for “Programmatic access”. Then attach the policy that pertains to the AWS Service you want to grant permission. For this tutorial, we will just select “AmazonSQSFullAccess”. But it’s also possible to create a custom policy that has limited access to individual service.
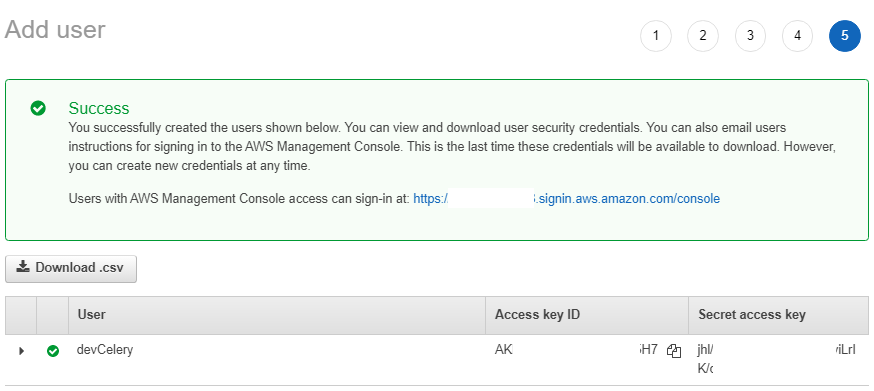
After you have created an IAM user, make sure to download the credentials that contains the Access key ID and Secret access key. You will be needing this to configure your AWS CLI.
Configure AWS CLI credentials in your EC2 Instance. The command bellow will ask you to enter your IAM user Access key ID and Secret access key.
aws configure --profile devCelery
Granting permission through an IAM Role
The second approach, which gives more security benefits, is to create an IAM Role for your EC2 Instance. Unlike the first approach, after we set up the role, we no longer have to manually configure the credentials in the CLI. Therefore, your server does not need to know about any credentials.
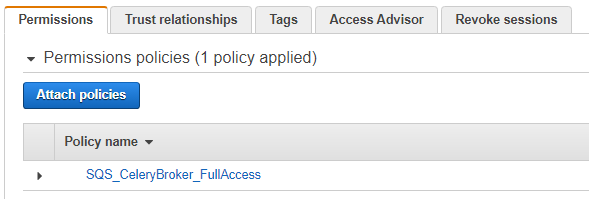
To create an IAM Role, select the type of trusted entity that is “AWS Service” and for “EC2”. Then we can assign the same policy we selected earlier, that is “AmazonSQSFullAccess”. And give your new IAM Role a name, for this tutorial I named it “SQS_CeleryBroker_FullAccess”.
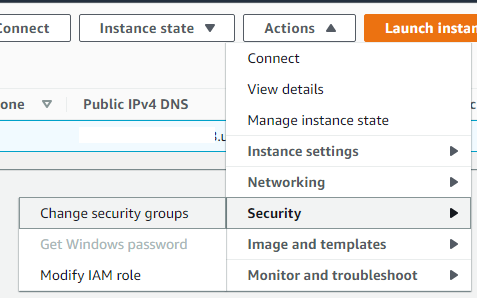
Assign IAM Role to EC2 Instance
All we have to do now is to assign the IAM Role that we’ve created in the previous step to the EC2 Instance we want to grant permission.
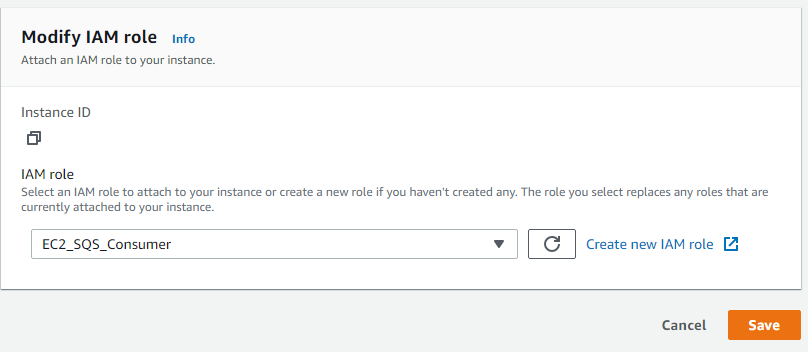
Select the IAM Role to attach to your instance.
AWS SQS message broker
A requirement to use SQS as message broker is the PyCurl library.
Install PyCurl in MacOS
Set the following environment variables prior to running pip install
export PYCURL_SSL_LIBRARY=openssl
export LDFLAGS="-L/usr/local/opt/openssl/lib"
export CPPFLAGS="-I/usr/local/opt/openssl/include"
Install PyCurl using pip package manager.
pip3 install --no-cache-dir pycurl
Install PyCurl in Linux
First, you need to install libcurl-devel and openssl-devel. If you have a Debian based OS, install the counterpart of these libraries in Debian.
yum install -y libcurl-devel openssl-devel
Next step, add an environment variable to specify what SSL library to use prior to installing PyCurl.
export PYCURL_SSL_LIBRARY=openssl
Finally, install PyCurl using pip package manager.
pip3 install pycurl --global-option="--with-openssl"
In addition, if you encounter an error related to “gcc” (error: command ‘gcc’ failed with exit status 1). Try to install python3-devel before installing PyCurl again.
yum install -y python3-devel gcc
Another prerequisite library for Celery to communicate with SQS is Boto3. You use this AWS SDK for Python to send API request programmatically.
pip install boto3
Configurations for SQS as broker
From using Redis as message broker from my previous post, we are going to make adjustments on celeryconfig.py file to apply new settings that are necessary for our SQS integration to work.
broker_url: str = "sqs://"
task_default_queue: str = "CeleryBroker"
task_create_missing_queues: bool = False
worker_enable_remote_control: bool = False
worker_send_task_events: bool = False
broker_transport_options = {
    "predefined_queues": {
        "CeleryBroker": {
            "url": "https://sqs.us-east-2.amazonaws.com/000/CeleryBroker",
        },
    },
}
Notice that we changed the broker URL and we defined our default queue “CeleryBroker”. And most importantly the URL of our SQS service. After changing the configuration, restart again your Celery worker. `
celery -A celery_app.app worker -n worker@%n -l INFO -c 1
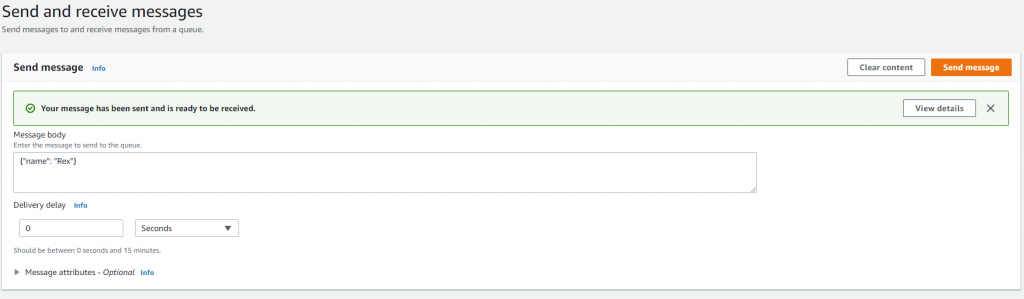
Finally, to test your Celery integration to SQS, you can send message directly from your SQS Service.
If you need just the raw commands I used to setup my Celery worker application for this tutorial, you can view this in the YippeeCode Code Editor section.