Android Firebase Cloud Messaging in Python
How to send Firebase Cloud Messages in Python programming? How to test Firebase Cloud Messaging in Android application?
In this tutorial I will demonstrate on how to set up a Firebase project and send push notification to Android devices through Cloud Messaging service. We will use the Firebase Admin SDK for Python. Also, I will create a simple Android app project in IntelliJ IDE to receive messages in a virtual device.
Create a Firebase Project and Service account
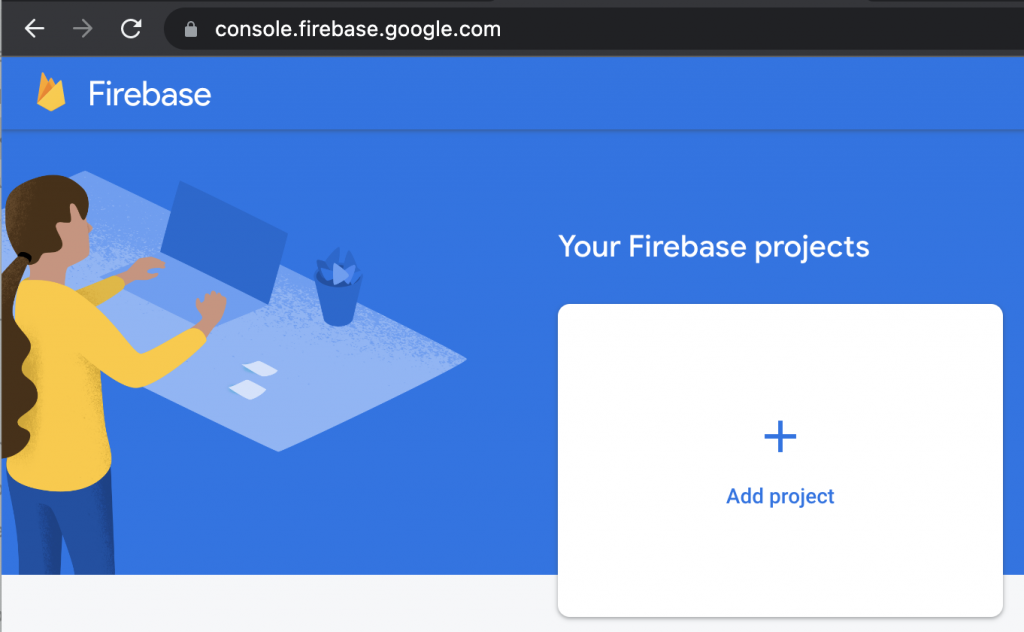
You will need to sign up for a Google account if you don’t have one yet. Then log in to Firebase Console. Click on Add Project, then give your project a name. For this tutorial I named my project “My First App”. I disabled google analytics for now and then hit Create project.
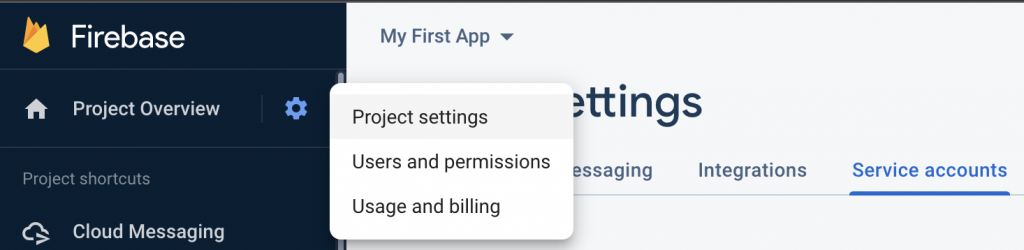
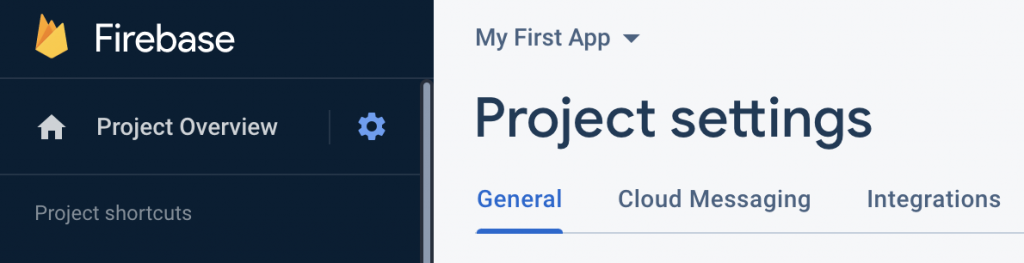
Once you have your project created, go to settings.
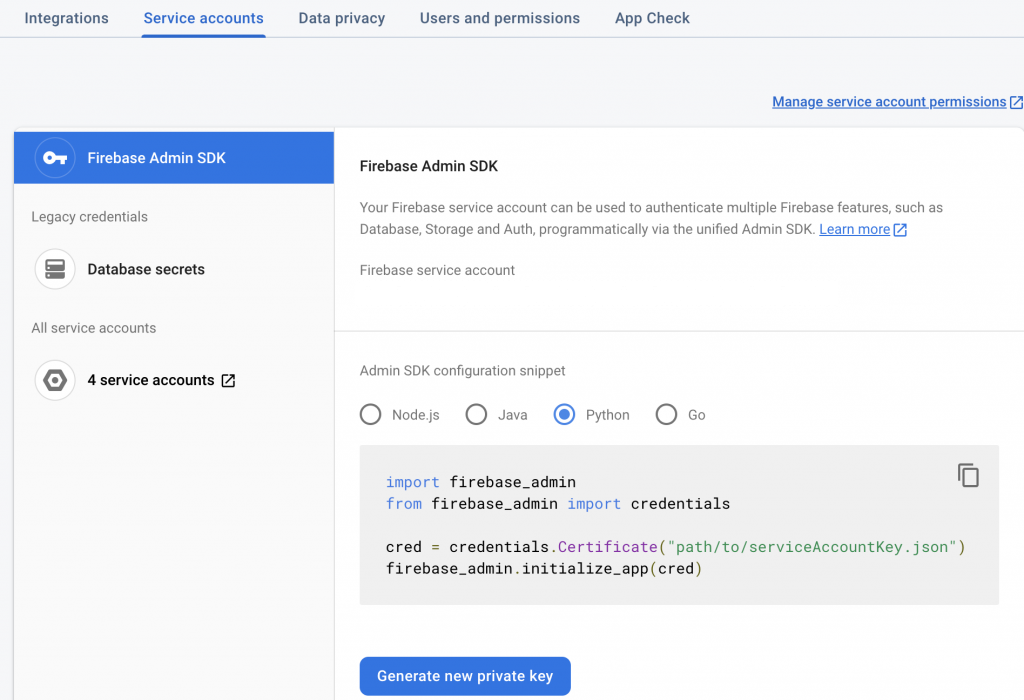
Under service accounts, generate private key for Python that we will be using to allow sending API actions. We’ll need to download this and copy the JSON file later into our Python project.
Python service integration to Firebase Cloud Messaging (FCM)
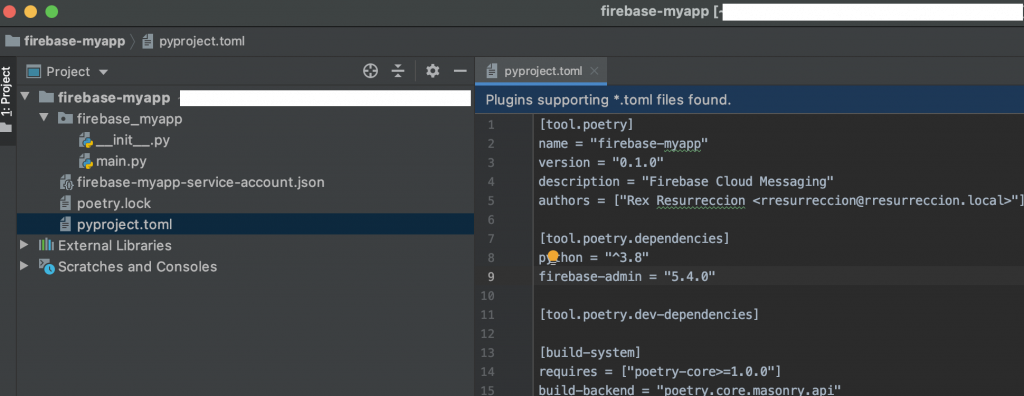
For the second part, I created a new Python project in my PyCharm IDE and named it “firebase-myapp”. This will act as a service for sending push notifications to my Android application later.
In my above screenshot, you will see my project structure. I copied over the generated private key earlier and named it “firebase-myapp-service-account.json”. And I used Poetry To install Firebase Admin.
You can download the code base in my GitHub repo, but first I wanted to discuss the parts of my implementation here.
Using the Service Account private key for authentication
from typing import Optional, List, Dict
import os

import firebase_admin
from firebase_admin.credentials import Certificate
from firebase_admin.messaging import Message, MulticastMessage, Notification, FCMOptions, AndroidConfig, BatchResponse
from firebase_admin import messaging


certificate: Certificate = Certificate(os.getenv("FIREBASE_SA_JSON_FILE", "serviceAccountKey.json"))
firebase_admin.initialize_app(credential=certificate)
device_token: str = os.getenv("ANDROID_DEVICE_TOKEN1")
To start with, In my snippet I’m importing all the modules and classes from firebase_admin . Notice the important lines here for the initialization of credentials and the device token device_token. For this tutorial, I am going to manually set up the device token here. But, imagine that this is automatically captured by your server when someone installed your application in their device (e.g. mobile phone) and you can store this in a database.
def send_message(
    data: Optional[Dict[str, str]] = None,
    notification: Optional[Notification] = None,
    token: Optional[str] = None,
    fcm_options: Optional[FCMOptions] = None,
    android_config: Optional[AndroidConfig] = None,
    dry_run: bool = False
) -> str:
    if not data and not notification and not (android_config and android_config.data):
        raise ValueError("No data or message to send")

    message: Message = Message(
        data=data,
        notification=notification,
        token=token,
        fcm_options=fcm_options,
        android=android_config,
    )

    return messaging.send(message, dry_run=dry_run) # return message ID


def send_multicast_message(
    data: Optional[Dict[str, str]] = None,
    notification: Optional[Notification] = None,
    tokens: Optional[List[str]] = None,
    fcm_options: Optional[FCMOptions] = None,
    android_config: Optional[AndroidConfig] = None,
    dry_run: bool = False
) -> List[str]:
    if not data and not notification and not (android_config and android_config.data):
        raise ValueError("No data or message to send")

    multicast_message: MulticastMessage = MulticastMessage(
        data=data,
        notification=notification,
        tokens=tokens,
        fcm_options=fcm_options,
        android=android_config,
    )

    batch_response: BatchResponse = messaging.send_multicast(multicast_message, dry_run=dry_run)
    response_message_ids: List[str] = [
        send_response.message_id for send_response in batch_response.responses
    ] if batch_response.responses else []

    if batch_response.failure_count:
        print(
            f"One or more messages has failed to send. "
            f"Failed: {batch_response.failure_count} "
            f"Message IDs: {response_message_ids}"
        )

    return response_message_ids
Next are the functions send_message and send_multicast_message. I made two examples, the first function send_message will send a message to a single device with a given token. This uses the messaging.send(message, dry_run=dry_run). And the second function send_multicast_message will send the message to multiple devices by passing a list of tokens. This uses the messaging.send_multicast(multicast_message, dry_run=dry_run)
Sending Message to Android device
if __name__ == '__main__':
    message_id: str = send_message(
        token=device_token,
        notification=Notification(
            title="Hello World",
            body="This is my first app",
        ),
    )
    print(f"Message sent: {message_id}")
Let’s take a look at this example function call above. Here I can send a Notification message using the Notification class.
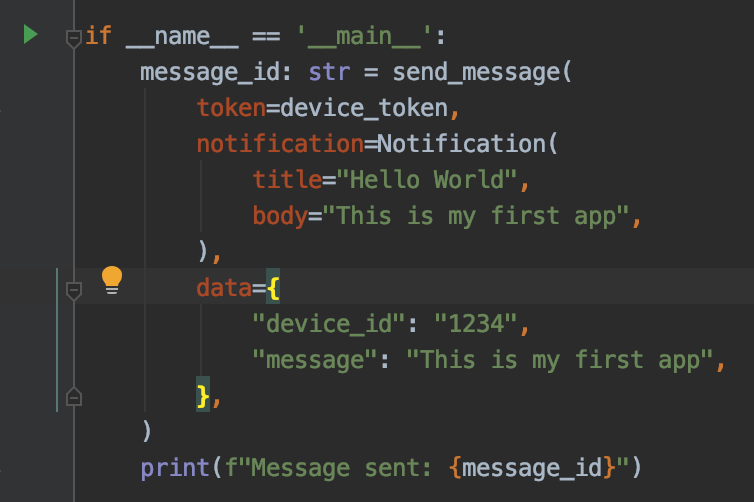
if __name__ == '__main__':
    message_id: str = send_message(
        token=device_token,
        data={
            "device_id": "1234",
            "message": "This is my first app",
        },
    )
    print(f"Message sent: {message_id}")
On the other hand, if you need to send an object of data, you can also directly pass a dictionary instead.
Sending Message to multiple Android devices
if __name__ == '__main__':
    message_ids: List[str] = send_multicast_message(
            tokens=[device_token],
            android_config=AndroidConfig(
                data={
                    "device_id": "1234",
                    "message": "This is my first app",
                },
                collapse_key="test-myapp-message",
                ttl=5000,
            ),
    )
    print(f"Messages sent: {message_ids}")
Compared to sending messages to a single device, here I can pass a list [device_token] of tokens for batch messaging. Also, I used the AndroidConfig to send data along with other configurations. The collapse_key is an identifier for a group of messages that can be collapsed, so that only the last message is sent when delivery can be resumed. And the ttl is the time-to-live duration of the message.
Android app for testing FCM with virtual devices
Now that we have our Python code all setup, we need a way to test our service when we send the notification to Firebase Cloud Messaging. Let’s follow the tutorial in IntelliJ on how to create an Android application and to install its components.
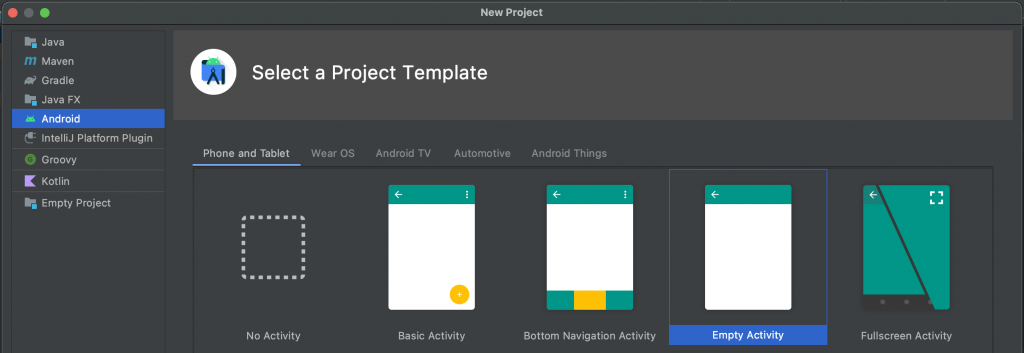
You can select any of the Project Template for your Android application. For testing purposes, we are not going to dig into the UI of the device. We will only use the android.util.Log to view the push notification messages and other logs in the terminal.
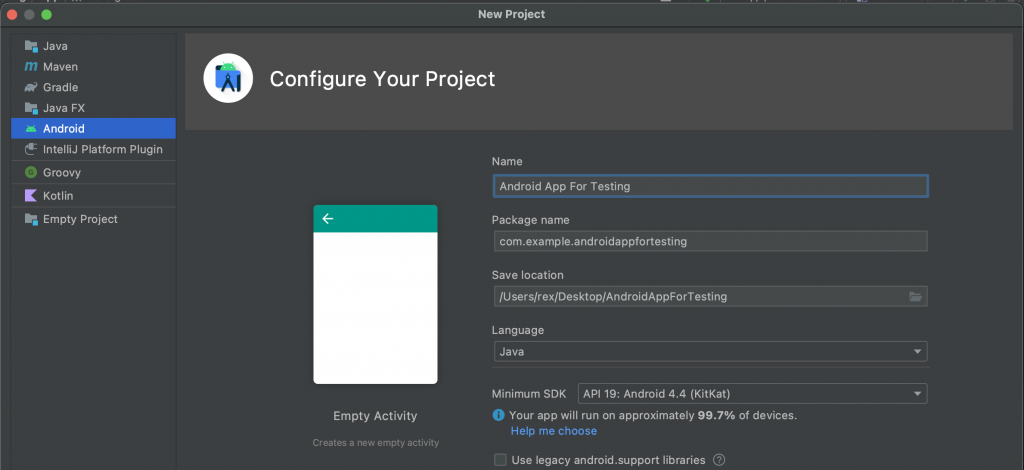
Configure your project. Give it a name and select the location where you want to save it. It’s important to mention that for this tutorial, I selected Java as the language and the minimum SDK has to be at least API version 19. Then click Finish.
Add Android application to Firebase project
Before we can continue with setting up an Android app project, first we need to register this in Firebase and download the google-services.json.
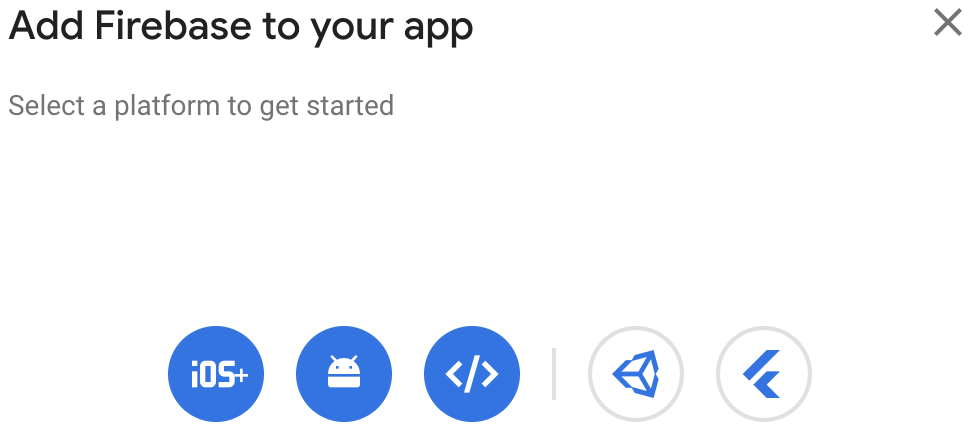
Again, under Project settings, General section. Scroll down, and click on Add app, then select the Android icon.
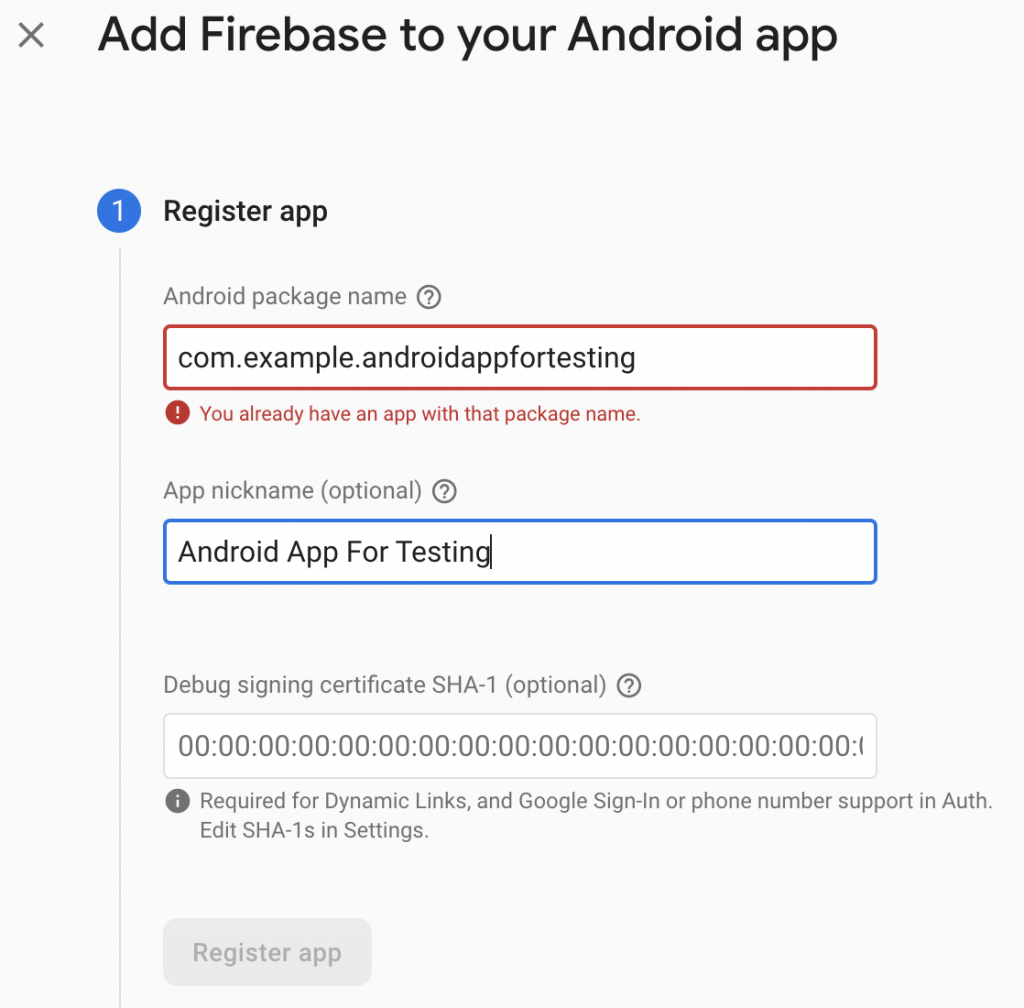
Go through the registration process for your app. The package name will be the name of the Android Java project we just created in IntelliJ earlier. That is com.example.androidappfortesting.
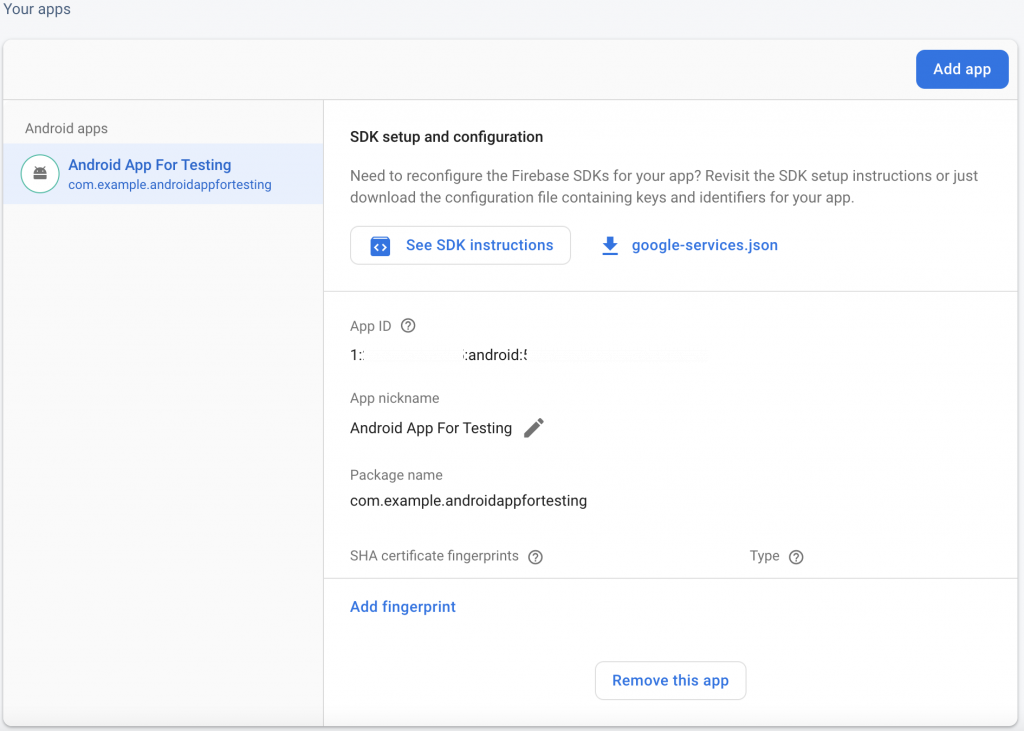
Once you have your Android app added to your Firebase console, you should see something similar above. Then you need to click on download google-services.json. Copy this inside the app folder of your Android Java project.
Add Google Service Plugin and Firebase SDK in Android application
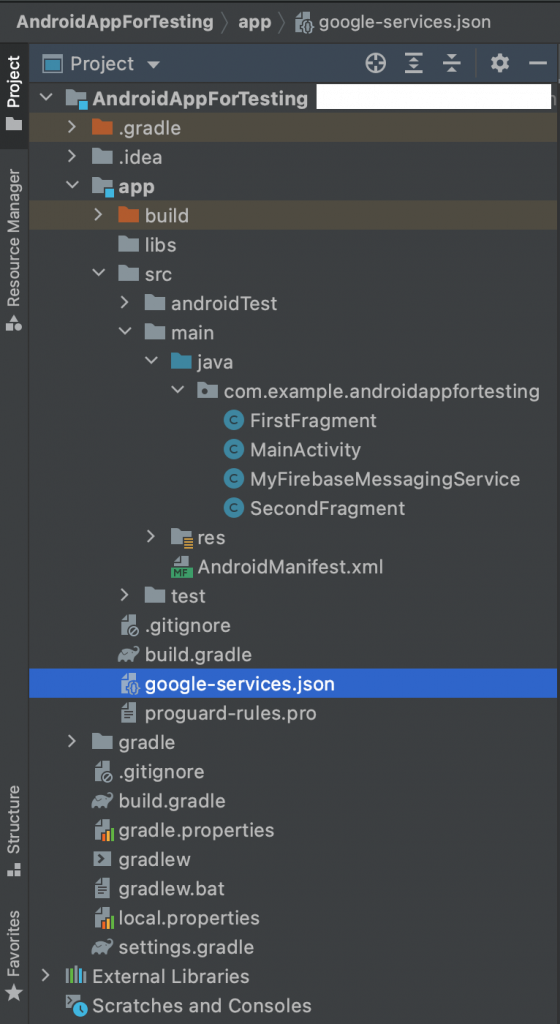
Back to our code base after adding this in Firebase console and downloaded the google-services.json. Next is to make the config file accessible to Firebase SDK. And to do that, we’ll add Google services plugin as a buildscript dependency.
// Top-level build file where you can add configuration options common to all sub-projects/modules.
buildscript {
    repositories {
        google()  // Google's Maven repository
        jcenter()
        mavenCentral()  // Maven Central repository
    }
    dependencies {
        classpath "com.android.tools.build:gradle:4.1.1"
        classpath 'com.google.gms:google-services:4.3.13'
        // NOTE: Do not place your application dependencies here; they belong
        // in the individual module build.gradle files
    }
}

allprojects {
    repositories {
        google()  // Google's Maven repository
        jcenter()
        mavenCentral()  // Maven Central repository
    }
}

task clean(type: Delete) {
    delete rootProject.buildDir
}
Be aware that there are two build.gradle files in your project. There is one in the root-level of your project and another one inside the app folder. You will need to first add this as a dependency in the root-level. For this tutorial, that is in AndroidAppForTesting/build.gradle.
plugins {
    id 'com.android.application'
    id 'com.google.gms.google-services'
}

android {
    compileSdkVersion 33
    buildToolsVersion "33.0.0"

    defaultConfig {
        applicationId "com.example.androidappfortesting"
        minSdkVersion 19
        targetSdkVersion 33
        versionCode 1
        versionName "1.0"

        testInstrumentationRunner "androidx.test.runner.AndroidJUnitRunner"
    }

    buildTypes {
        release {
            minifyEnabled false
            proguardFiles getDefaultProguardFile('proguard-android-optimize.txt'), 'proguard-rules.pro'
        }
    }
    compileOptions {
        sourceCompatibility JavaVersion.VERSION_1_8
        targetCompatibility JavaVersion.VERSION_1_8
    }
}

dependencies {

    implementation 'androidx.appcompat:appcompat:1.1.0'
    implementation 'com.google.android.material:material:1.1.0'
    implementation 'androidx.constraintlayout:constraintlayout:1.1.3'
    implementation 'androidx.navigation:navigation-fragment:2.2.2'
    implementation 'androidx.navigation:navigation-ui:2.2.2'
    implementation 'com.google.firebase:firebase-messaging'
    implementation 'com.google.firebase:firebase-analytics'
    testImplementation 'junit:junit:4.+'
    androidTestImplementation 'androidx.test.ext:junit:1.1.1'
    androidTestImplementation 'androidx.test.espresso:espresso-core:3.2.0'
    implementation platform('com.google.firebase:firebase-bom:30.4.1')
}
And then in app folder build.gradle file, add the Google services plugin and Firebase SDK as dependency. For this tutorial, that is in AndroidAppForTesting/app/build.gradle. In my above configuration file, focus on the plugins and dependencies sections where I added all the google stuff, including this line for the FCM `implementation 'com.google.firebase:firebase-messaging'. You can find a bunch of other Gradle dependencies in their library.
Finally, sync your Android project with the changes we’ve made in the Gradle files. Run the Build Project in IntelliJ IDE.
Logging the Token and Message Received in Android application
In your project, create a service class in the main Java package that extends the `FirebaseMessagingService class. Add these two methods onNewToken and onMessageReceived as mentioned in the documentation for monitoring a generated token and for receiving a message.
public class MyFirebaseMessagingService extends FirebaseMessagingService {
    public static final String TAG = "Push-Event";
    public static final String CHANNEL_ID = "testing_notification";
    public static final String CHANNEL_NAME = "com.example.androidappfortesting";

    @Override
    public void onNewToken(@NonNull String token) {
        Log.d(TAG, "Refreshed token: " + token);
        super.onNewToken(token);
    }

    @Override
    public void onMessageReceived(RemoteMessage remoteMessage) {
        Log.d(TAG, "From: " + remoteMessage.getFrom());

        // Check if message contains a data payload.
        if (remoteMessage.getData().size() > 0) {
            Log.d(TAG, "Message data payload: " + remoteMessage.getData());
        }

        // Check if message contains a Notification payload.
        if (remoteMessage.getNotification() != null) {
            String title = remoteMessage.getNotification().getTitle();
            String description = remoteMessage.getNotification().getBody();
            Log.d(TAG, "Message Notification Title: " + title);
            Log.d(TAG, "Message Notification Description: " + description);
        }
    }
}
In this example, I am logging the Token and Message (data and notification) for verifying that our Android Firebase Cloud Messaging sent in Python is successful. The first log will be important Log.d(TAG, "Refreshed token: " + token);. Keep in mind that you will see the log once when you first run your virtual device. If you want to see the log again, you will need to uninstall the Android app and run the device again.
Declaring FirebaseMessagingService into the App Manifest
<service android:name=".MyFirebaseMessagingService">
            <intent-filter>
                <action android:name="com.google.firebase.MESSAGING_EVENT" />
            </intent-filter>
</service>
In order for the service class MyFirebaseMessagingService to work, we need to declare this in the AndroidManifest file, that’s inside the app main folder. Add the XML inside the <application> ... </application> tag.
Creating the Virtual Device for testing in IntelliJ
We have come to the exciting part! We can now create our virtual device that can receive messages from our Android Firebase Cloud Messaging sent from the Python code we set up earlier. Again, I am building and running my Android application in IntelliJ IDE
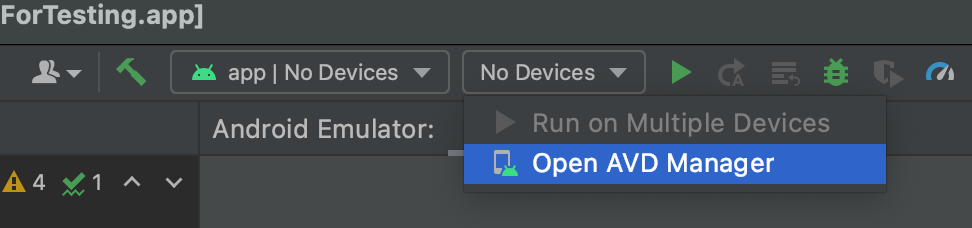
On the top right drop down menu, click on Open AVD Manager.
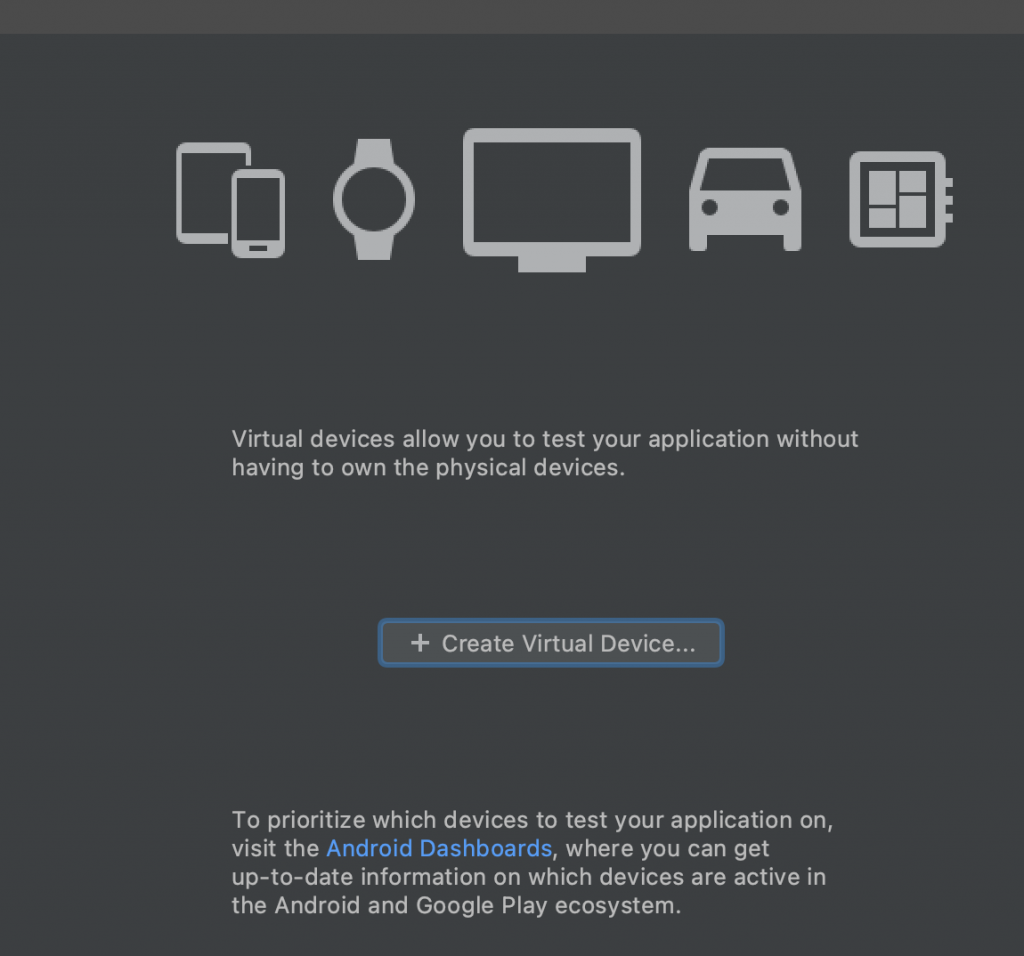
Follow the steps in the panel for creating the virtual device.
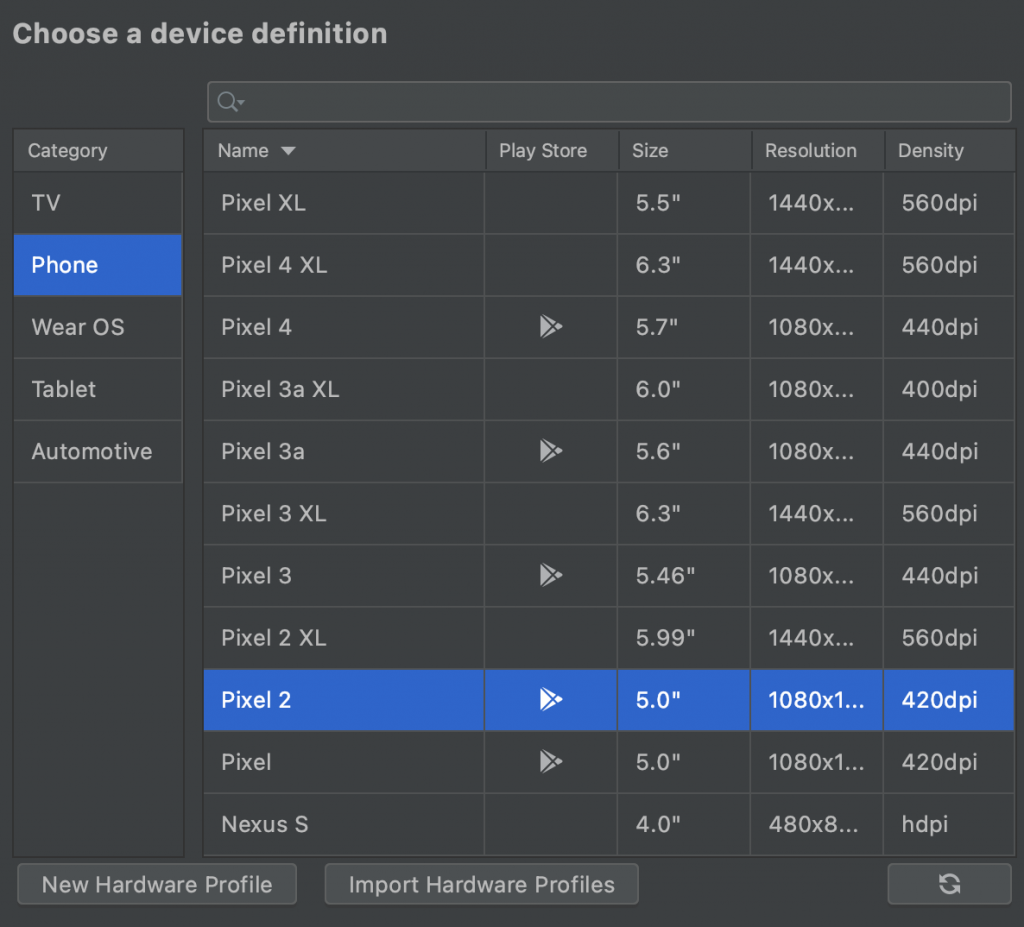
Select the applicable device that you will use for testing. For this tutorial, I selected a Pixel 2 phone.
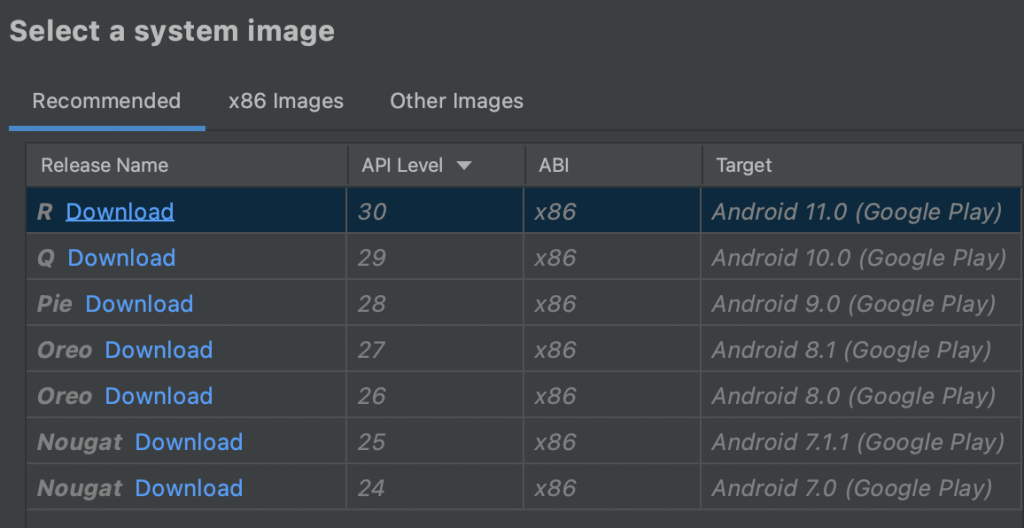
Choose which system image you want to use for your device to download. For Pixel 2 phone, I downloaded the one for Android 11.0.
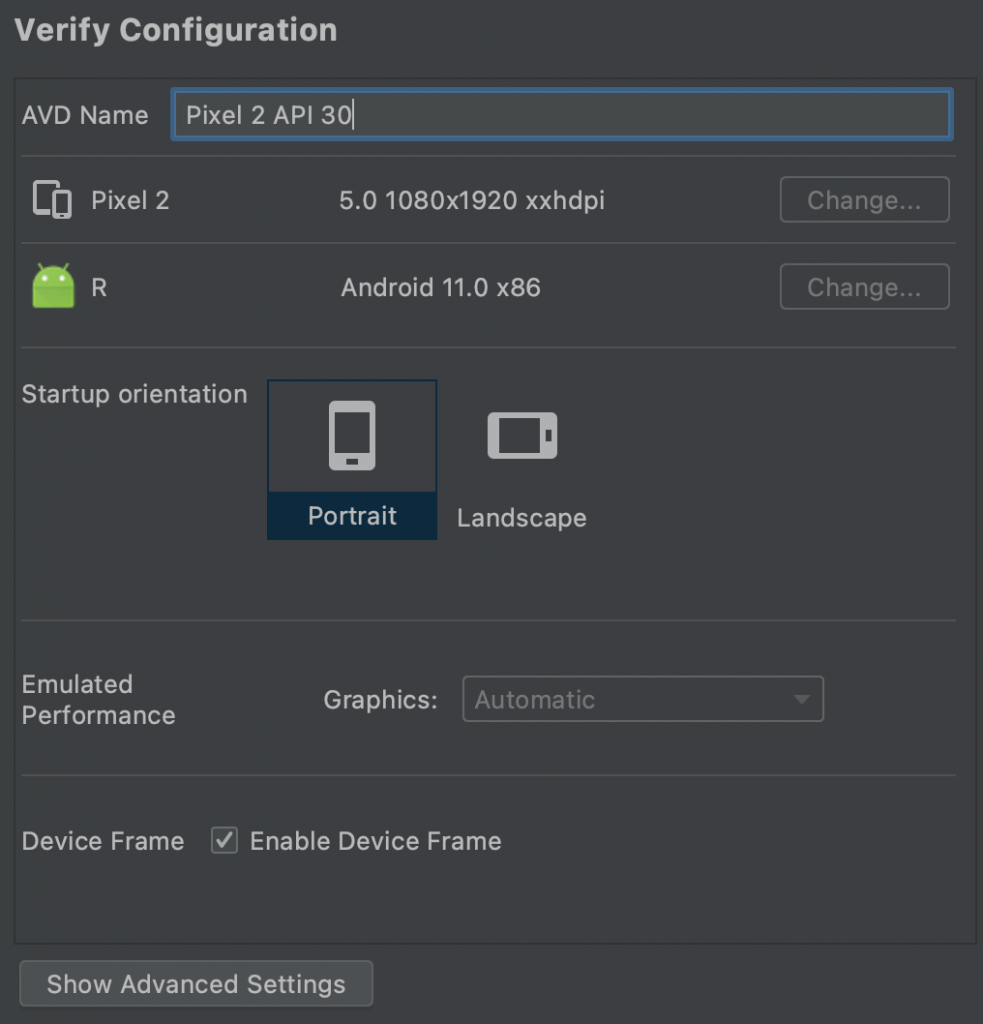
Verify your configuration and select how you want your device display and hit Finish.
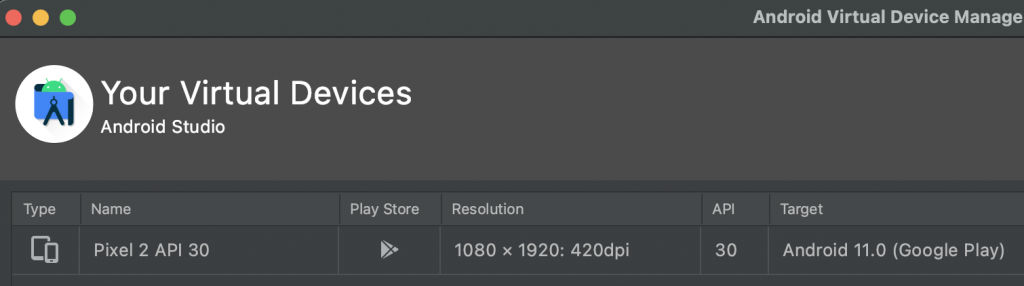

Select your device on the menu and click on the play button to start connecting to AVD emulator.
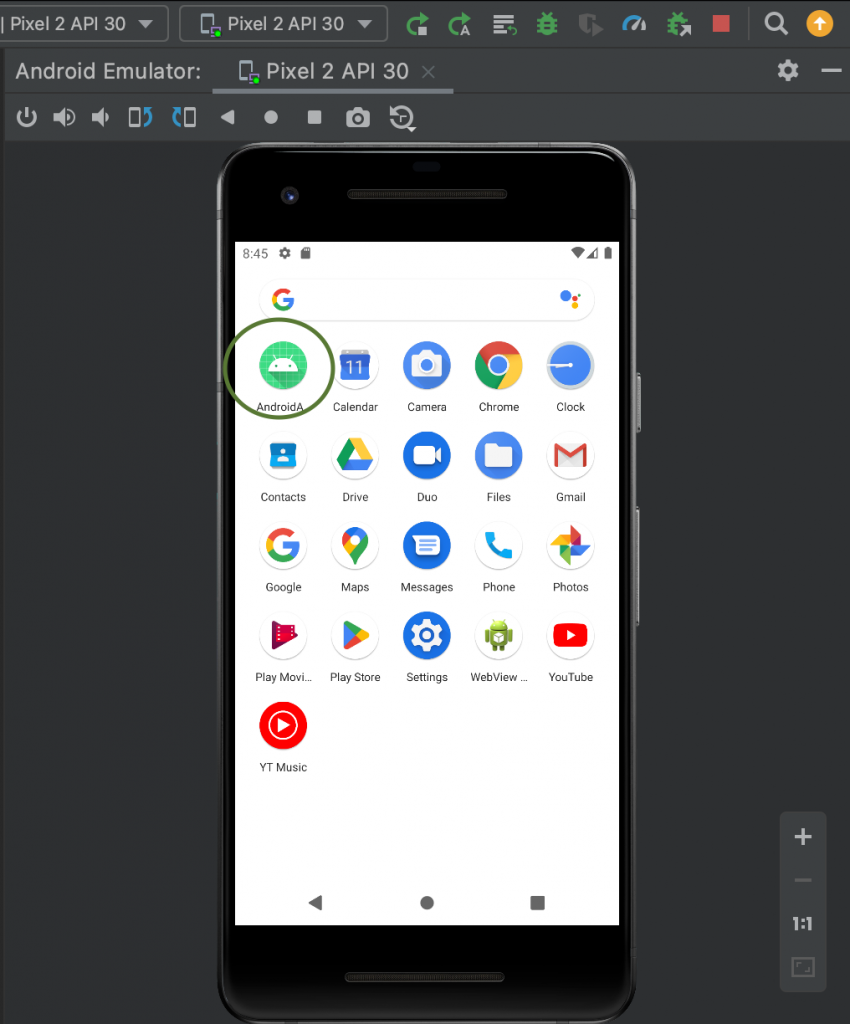
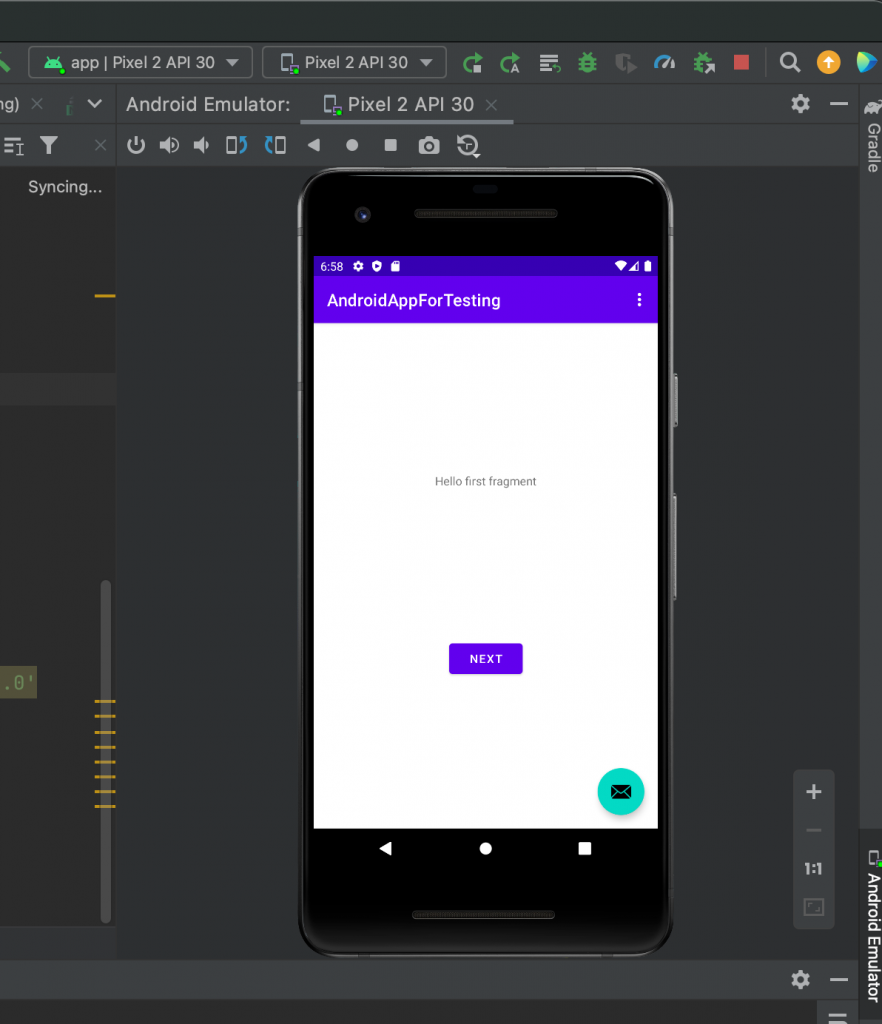
If everything is setup correctly, you’ll be able to see something similar above. And just like in a regular phone, open on the menu the Android Java project.
Sending Android Firebase Cloud Messaging in Python
In the early part of my tutorial, I have created two functions for this demo. These are send_message and send_multicast_message. Now, I wanted to show some examples on how to use these functions to send push notification.
if __name__ == '__main__':
    message_id: str = send_message(
        token=device_token,
        notification=Notification(
            title="Hello World",
            body="This is my first app",
        ),
        data={
            "device_id": "1234",
            "message": "This is my first app",
        },
    )
    print(f"Message sent: {message_id}")
On my first example above, I used send_message to send a single push message with a body and title wrapped in Notification class. In addition, I added some data as dict with device_id and message .
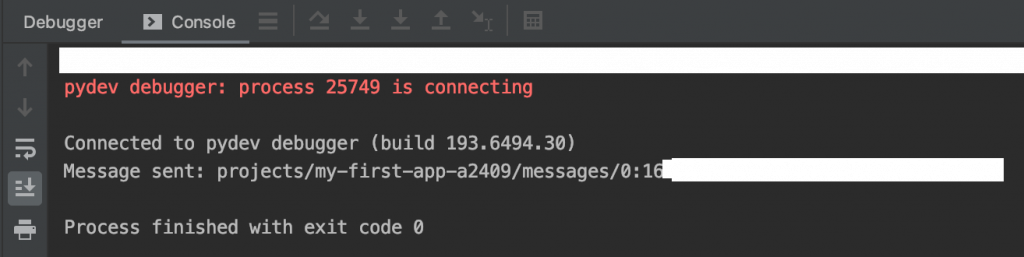
As a result, I get a message_id from FCM as a response if it’s a success.
if __name__ == '__main__':
message_ids: List[str] = send_multicast_message(
tokens=[device_token],
android_config=AndroidConfig(
data={
"device_id": "1234",
"message": "This is my first app",
},
collapse_key="test-myapp-message",
ttl=5000,
),
# dry_run=True,
)
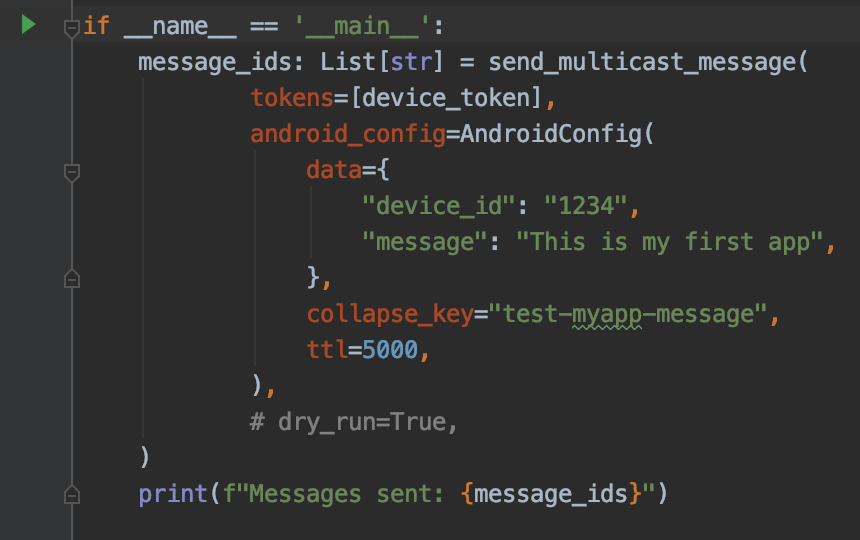
print(f"Messages sent: {message_ids}")For a more complex example above, I am able to send push messages to multiple devices by passing a list of tokens to function send_multicast_message. This time I am passing new parameters wrapped in AndroidConfig class. Aside from data, I have collapse_key parameter that allows sending the latest message only when there are multiple with the same collapse key. Optional, is the dry_run parameter of send_multicast, that can perform all the usual validations and emulates the send operation, but not actually send the message.
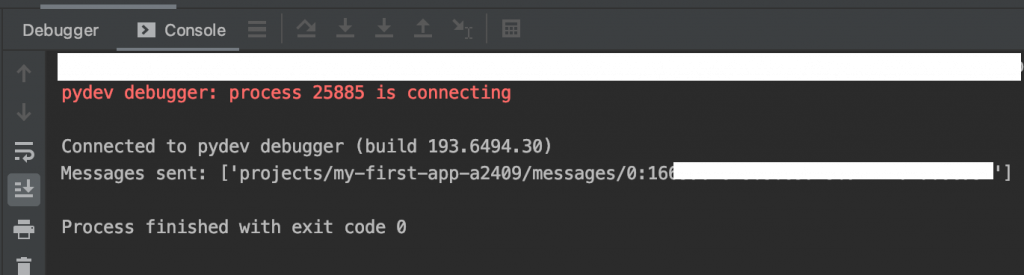
And this time I get a list of message_id as a result, for the multiple messages that was sent.
Viewing push notification messages in Logcat and Firebase console Dashboard
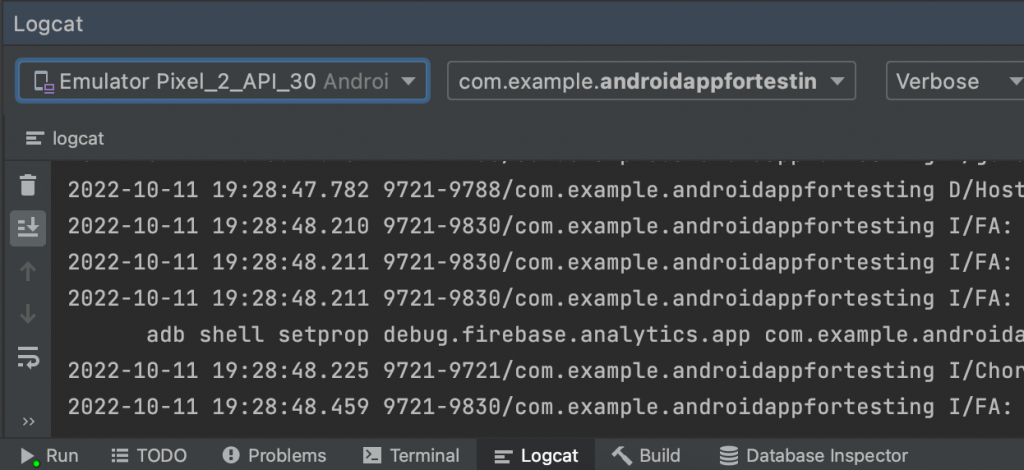
At this point, we have done enough so we can start sending Push notifications and receive messages in our Android application. To view this, open the Logcat panel in IntelliJ IDE while your Android app is running.
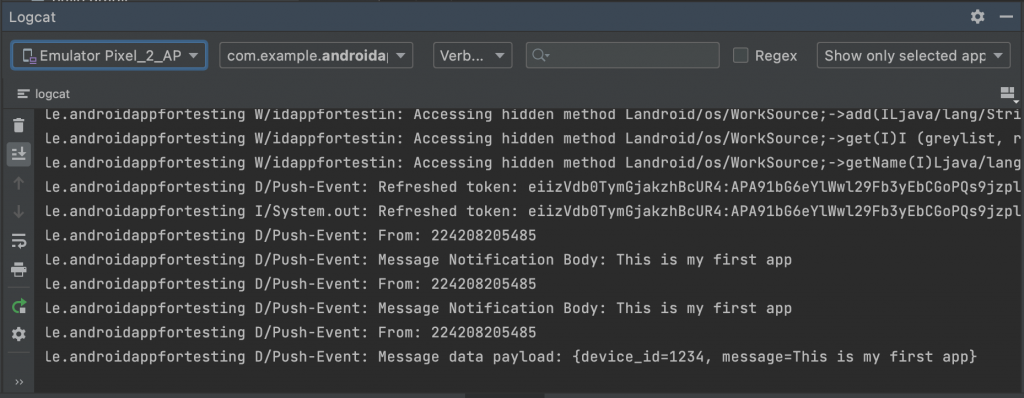
Based on my example push notification, you should see a result something similar above. You will notice the Notification and data received with device_id and message.
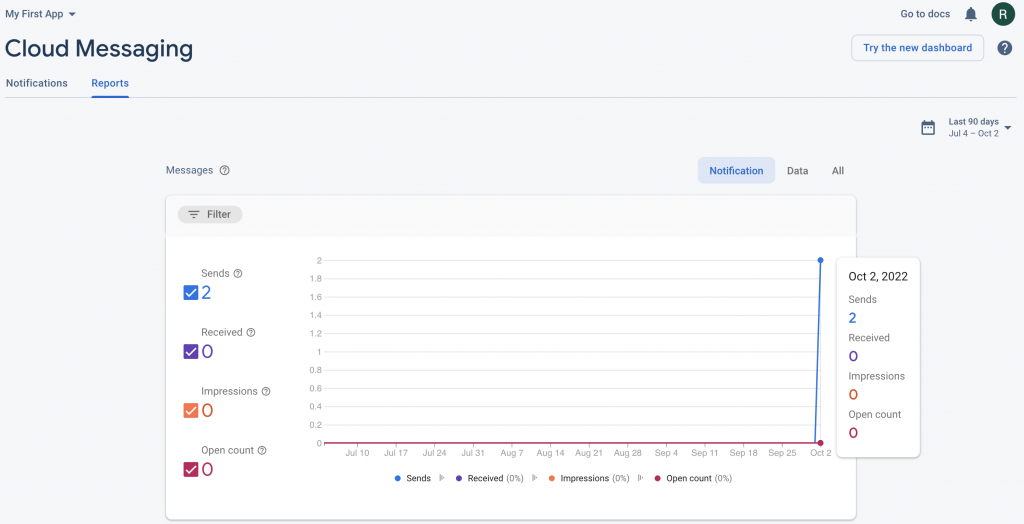
Another helpful tool is the Dashboard in your Firebase console. In here, it shows that two messages was sent and we’ve done this through our Python app.
Summary
In this tutorial, we just learned on how to create a project in Firebase console. We used Firebase messaging service to send push notification. We learned to implement an Android Firebase Cloud Messaging (FCM) in Python and test this by creating a simple Android Java application.